Bringing life to your walls via interior house painting is a great technique to refresh your living space and display your distinct style. Whether you’re looking to create a quiet ambiance or add a flash of brilliant color, painting your walls may have a big influence on the overall tone of your house. To help you obtain the greatest effects, here’s a thorough guide to inside-home painting:
Plan and Prepare
Planning and planning are crucial to a successful inside-home painting job. Start by evaluating the space you wish to paint, considering aspects such as room size, layout, and existing architectural qualities. Take note of any spots that need specific repairs, such as shattered walls or ornate workmanship. Next, choose your colors and finishes, taking into account the perfect environment and style for each room.
Gather all the essential equipment, including high-quality paint, brushes, rollers, drop cloths, painter’s tape, sandpaper, and patching compound. Clear the room of items and cover the flooring and fixtures with drop cloths to protect them. If required, clean the walls and conduct any necessary repairs, such as fixing holes or sanding rough areas. Finally, whether you’re interior house painting over a dark tone or bare walls, apply a layer of primer. Proper planning and preparation can insure a smooth and efficient inside home painting project.

Surface Preparation
Surface preparation is a vital stage in developing a professional and long-lasting paint finish for your interior walls. Start by cleaning the space, removing furniture and decorations, and conserving fixtures with interior house painting tape. Next, thoroughly clean the walls using a mild detergent solution to remove dust, dirt, and grease. Repair any flaws, such as holes or cracks, by filling them with patching compound or spackle and smoothing the surface.
Sand the walls carefully to produce a smooth and slightly roughened surface that aids paint adherence and wipes away any sanding dust. If required, use a primer to produce an equal foundation and assist paint adherence. Proper surface preparation ensures that the paint adheres quickly, offers a smooth finish, and helps the paint job persist longer. A head-breaking listen to interior home painting for novices
Prime the Walls
Priming the walls is a critical step in interior home painting that helps establish a smooth and durable surface for the paint to adhere to. Priming is effective in several instances, such as when painting over a dark hue with a lighter one, when dealing with stains or defects on the walls, or when painting over bare drywall or new plaster.
To prime the walls, start by ensuring the space is properly prepped, including emptying the room of furniture and covering the ground with drop cloths. Use painter’s tape to cover fixtures, switches, outlets, and any surfaces you wish to keep clear of primer. Stir the primer completely before applying it. Begin by cutting in the edges and corners of the walls with a brush, providing a seamless transition. Then, use a roller to apply the primer to the greatest portions of the walls, working in acceptable chunks. Apply an equal coat, covering the complete surface. Allow the primer to dry thoroughly according to the manufacturer’s specifications before continuing with the paint application.
Priming the walls offers various advantages, including improved paint adherence, larger color coverage, and a longer lifetime of the inside home painting. It helps form a homogeneous surface, seals porous materials, and may disguise stains or discolorations. Taking the time to prepare your walls before painting will contribute to a professional and long-lasting finish.

Paint Application
Paint application is the exciting part of the inside interior house painting process when you bring your selected colors to life on your walls. Here’s a strategy to establishing an effective paint application:
- Prepare the paint: Make sure the paint is well mixed by swirling it thoroughly with a paint stirrer. This maintains an equal hue and consistency throughout the can.
- Use the correct tools: Select high-quality paint brushes and rollers that are suited for the kind of paint and the surface you are interior house painting. Brushes with synthetic bristles perform well with latex paints, whereas natural bristle brushes are good for oil-based paints. Use a roller cover with the right nap length for the texture of your walls.
- Cut in the edges: Start by cutting in around the edges of the walls, where they meet the ceiling, baseboards, and corners. Use a brush to carefully apply a straight and equal line of paint, using a steady hand and taking your time for tidy and accurate cutting-in.
- Roll the walls: Once the edges are done, it’s time to roll the walls. Pour the paint into a paint tray and pack the roller evenly. Start from the top corner of the wall and work your way down, using a “W” or “M” motion to disperse the paint evenly. Fill in the remainder of the wall with vertical or horizontal strokes, keeping a moist edge to avoid lap marks.
- Apply numerous coats: In most circumstances, you will need to apply at least two coats of paint for a smooth and consistent finish. Permit each coat to dry completely prior to applying the following. Follow the paint manufacturer’s directions about drying timeframes.
- Take care of touch-ups: After the paint has dried, check the walls for any missing spots, uneven regions, or defects. Use a brush or tiny roller to touch up these spots, creating a uniform look across the space.
Remember to work gradually, painting one wall at a time, and be aware of drips or splatters. Proper paint application methods and attention to detail can help you create a professional-looking finish that improves the attractiveness of your interior house painting space.

Finishing Touches
After the paint has dried and your walls have gotten a new coat of color, it’s time to add those last finishing touches that will really complete your interior house painting job. These minor elements may make a major impact on the overall appearance and feel of the room. Here are some crucial considerations for the final touches:
- Remove painter’s tape: Take a delicate approach to remove the painter’s tape from the edges, corners, and any locations where it was utilized to protect fixtures or trim. Peel it off cautiously and at a 45-degree angle to maintain neat lines and prevent any unintended harm to the newly interior house painting walls.
- Inspect and touch up: Take a detailed look at the walls to find any missing areas, uneven coverage, or defects. Use a tiny brush or roller to touch up these spots, adding a thin layer of paint to flawlessly merge them with the rest of the wall. Pay attention to transitions between various hues or neighboring walls to produce a seamless and coherent look.
- Clean up: Properly dispose of any used paint cans, brushes, and other materials according to local standards. Clean your brushes and rollers thoroughly using the right cleaning solution, whether it’s water for latex paint or paint thinner for oil-based paint. Wipe clean any surfaces that may have acquired paint splatters or drips throughout the painting process.
- Reinstall fixtures and accessories: Once the paint is totally dry, reconnect switch plates, outlet covers, and any other fixtures or accessories that were removed during the painting process. Make sure they are correctly aligned and firmly attached. Consider upgrading or changing hardware to fit the new aesthetic of the area.
- Arrange and decorate: With the freshly painted walls as a blank canvas, use the chance to rearrange furniture and add decorative pieces that improve the area. Consider the intended style and ambiance you wish to achieve. Arrange furniture to improve flow and usefulness. Hang artwork, mirrors, or pictures that complement the color scheme and provide visual interest to the walls. Consider adding window coverings such as drapes or blinds that harmonize with the new color palette.
- Attention to detail: Don’t neglect the minor elements that may boost the overall appearance of the place. Consider adding ornate molding or trim to enhance architectural elements. Upgrade light fixtures to boost illumination and create the desired mood. Introduce plants, carpets, or accent cushions to bring texture and warmth to the area. Take the time to arrange bookcases, tabletops, or mantels with carefully picked pieces that represent your unique taste and give flair to the environment.
By focusing on these finishing touches, you can truly bring your inside-home painting project to its greatest potential. Taking the time to remove the tape properly, touch up any imperfections, clean up appropriately, and pay attention to details will result in a polished and unified aesthetic that expresses your personal taste and produces a welcoming environment in your home. Enjoy the ultimate consequence of your interior house painting venture and take pride in the revived and bright space you have created.

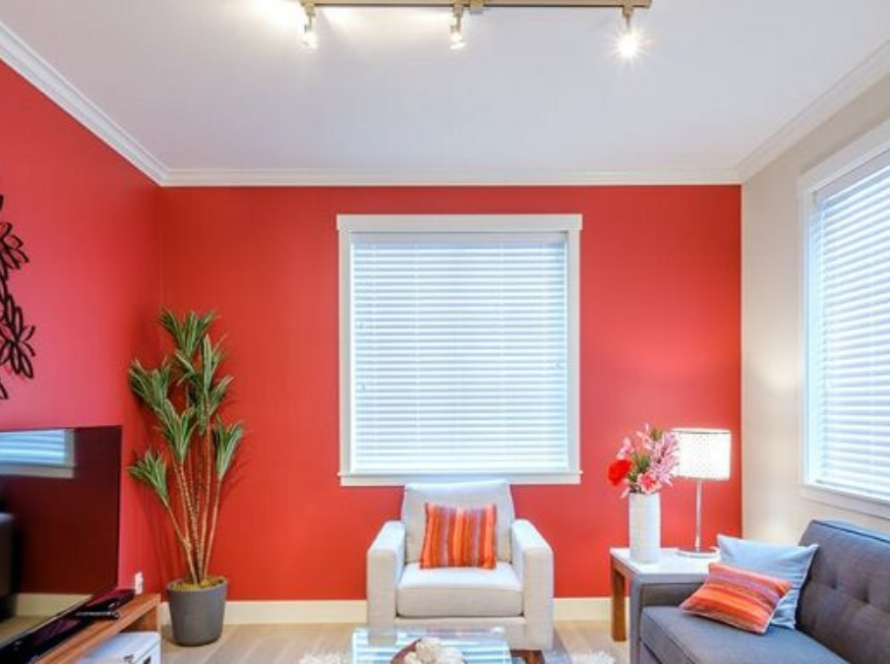
Enjoy the Results
Now that your interior home painting project is complete and the finishing touches have been done, it’s time to step back and enjoy the fruits of your effort. Take a minute to absorb the transformed space and the impact that fresh, vibrant colors may have on the overall vibe of your home. Sit back and relish in the sense of pleasure that comes with completing a successful painting project.
Whether you’re relaxing in the living room, cooking in the recently rebuilt kitchen, or unwinding in the cozy bedroom, take the time to really soak yourself in the beauty and amazing spirit that your newly painted walls express. Allow yourself to be motivated and invigorated by the refreshed ambience of your property, and take joy in the knowing that you have created a space that embodies your personal style and taste. Embrace the pleasure of the accomplished project and feel the transformative power of a well-executed inside-home painting endeavor.