You pull into your driveway after a long day and look at your house. Does the exterior make you smile, or do you notice peeling paint, faded colors, and worn siding? The outside of your home is the first thing guests and neighbors see. A fresh coat of paint can completely revitalize its appearance and boost your property value.
Painting your home’s exterior might feel like a massive undertaking. However, breaking the process down into manageable steps makes it highly achievable. Whether you plan to hire professionals or tackle the project yourself, understanding the process ensures a beautiful, long-lasting result.
This guide will walk you through everything you need to know about residential house exterior painting. We will cover why exterior painting matters, how to choose the right materials, essential preparation steps, pro techniques, and maintenance tips to protect your investment.
Why Painting Your House Exterior Matters
A fresh coat of paint does much more than change the color of your home. It acts as a vital layer of protection against the elements. Your siding faces harsh sun, driving rain, freezing temperatures, and high humidity throughout the year. Quality exterior paint creates a barrier that shields the underlying materials from moisture damage, wood rot, and pest infestations.
Updating your exterior paint is also one of the most cost-effective ways to increase your home’s curb appeal. If you plan to sell your home soon, an attractive exterior creates a strong first impression for potential buyers. It signals that the property has been well-maintained. Even if you plan to stay for decades, a beautiful exterior allows you to take pride in your home.
Finally, regular painting prevents larger, more expensive repairs down the road. By maintaining that protective painted barrier, you extend the life of your siding, trim, and fascia boards.
How to Choose the Right Exterior Paint
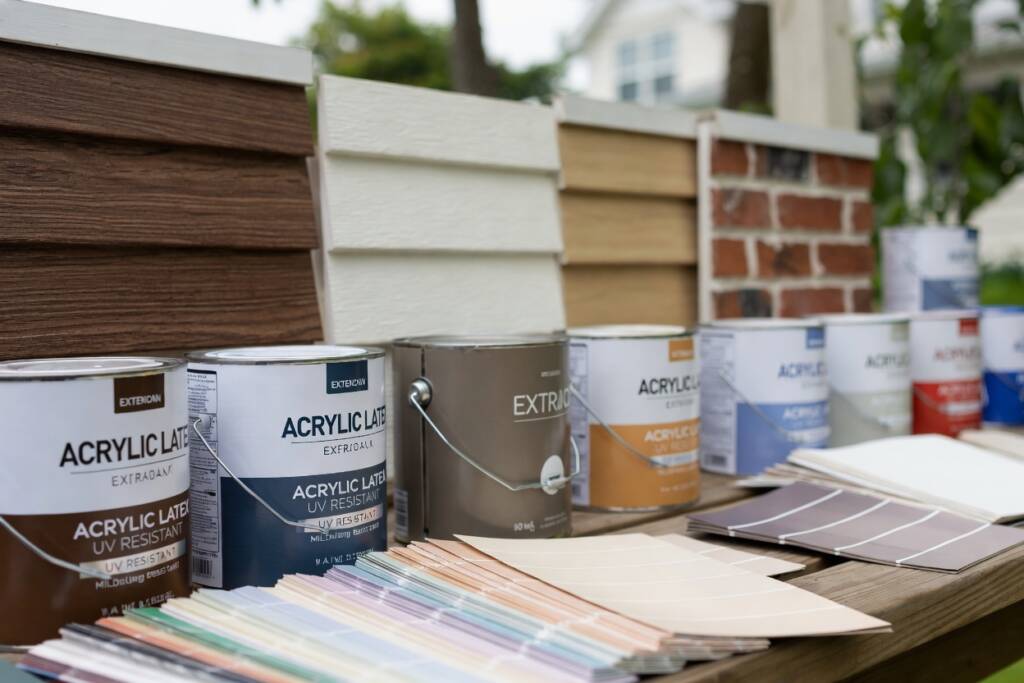
Selecting the perfect paint involves more than just picking your favorite color swatch. You need a product designed specifically to withstand your local climate and adhere properly to your home’s exterior materials.
Consider the Climate and Surface
Different paints perform better in specific environments. If you live in a region with intense sunlight, look for paints with UV resistance to prevent premature fading. For wet, humid climates, prioritize mildew-resistant formulas.
You also need to match the paint to the surface material. Wood siding, stucco, brick, and vinyl all require specific types of paint for maximum adhesion. Acrylic latex paint is generally the best all-around choice for most exteriors. It remains flexible after drying, which allows it to expand and contract with temperature changes without cracking.
Paint Finishes Explained
The finish, or sheen, of your paint affects both its appearance and durability.
- Flat/Matte: Great for hiding surface imperfections on older siding, but harder to clean.
- Satin/Eggshell: Offers a subtle shine and easier cleaning. This is the most popular choice for the main body of a house.
- Semi-Gloss and Gloss: Highly durable and easy to wipe down. Use these finishes for trim, doors, and shutters to create a nice visual contrast against the siding.
Essential Preparation Steps Before Painting
Skipping preparation is the fastest way to guarantee a failed paint job. Professional painters know that prep work often takes longer than the actual painting. Taking the time to properly prepare your exterior ensures the new paint will stick and look flawless for years.
Cleaning and Repairing
Start by giving your home a thorough bath. Dust, dirt, cobwebs, and mildew prevent new paint from adhering to the surface. Use a pressure washer on a low setting or a garden hose with a stiff scrub brush to clean the exterior. Mildew requires a specialized cleaning solution or a mix of water and bleach to kill the spores completely.
Once the surface is clean and dry, inspect the entire exterior for damage. Look for rotting wood, cracked stucco, or rusted metal. You must repair or replace damaged materials before opening a single can of paint. Fill small cracks and holes with an exterior-grade patching compound or caulk.
Scraping and Sanding
New paint will not stick to old, peeling paint. Use a paint scraper to remove any loose, flaking, or bubbling paint. You do not need to remove all the old paint, just the parts that are no longer firmly attached to the house.
After scraping, sand the edges of the remaining paint to create a smooth transition between the bare spots and the painted areas. Sanding also roughs up the existing glossy finishes, giving the new paint a better surface to grip.
Priming the Surface
Primer is essential for sealing porous surfaces, blocking stains, and providing a uniform base for the topcoat. You should definitely use a primer over any areas of bare wood, patched spots, or if you are making a drastic color change. Many high-quality exterior paints now come as a “paint and primer in one,” but heavily weathered areas still benefit from a dedicated coat of high-build primer.
Tools and Techniques for a Professional Finish
Using high-quality tools and proper techniques separates a messy amateur job from a stunning professional finish. Investing in good equipment saves time and frustration.
Must-Have Tools
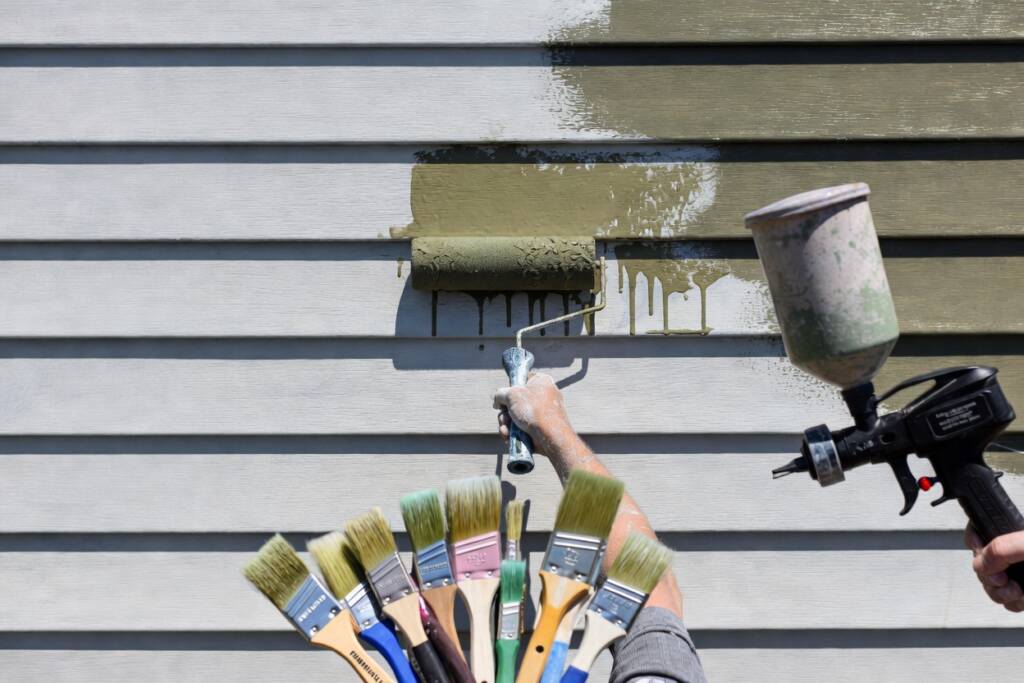
Do not cut corners on your brushes and rollers. Cheap brushes leave streaks and shed bristles onto your wet paint.
- Brushes: Buy angled synthetic brushes for cutting in around windows, doors, and trim.
- Rollers: Choose thick-nap rollers for rough surfaces like stucco, and smooth-nap rollers for smooth wood or hardboard siding.
- Sprayers: An airless paint sprayer can cover large areas quickly, but requires careful masking of windows and landscaping.
- Safety Gear: Sturdy ladders, drop cloths, painter’s tape, and safety glasses are non-negotiable.
Application Techniques
Always paint from the top down. Start with the gutters, fascia, and eaves, then work your way down the siding. This method allows you to easily catch and brush out any drips that fall onto unpainted areas.
When using a brush or roller, maintain a “wet edge.” This means you should always overlap your newly applied paint onto the wet paint of the previous stroke. Letting an edge dry before painting next to it creates visible lines and an uneven finish. Never paint in direct, blazing sunlight. The heat forces the paint to dry too quickly, leading to brush marks and poor adhesion. Follow the shade around your house as you work.
Common Exterior Painting Mistakes to Avoid
Even enthusiastic DIYers can fall into traps that compromise their hard work. Keep these common mistakes in mind so you can avoid them entirely.
First, never paint over wet wood. Whether it is morning dew or leftover moisture from power washing, water trapped under new paint causes bubbling and peeling. Always wait for the exterior to dry completely.
Second, do not ignore the weather forecast. Paint needs time to cure properly. Avoid painting if rain is expected within 24 hours. Similarly, pay attention to temperature guidelines on the paint can. Painting when it is too cold prevents the paint from forming a durable film.
Finally, avoid buying cheap paint. Bargain brands often have less pigment and fewer protective binders. You will end up doing more coats to get proper coverage, and the paint will likely fade and peel much faster than a premium brand.
Maintenance Tips to Make Your Paint Last
You invested significant time and money into painting your home. A little ongoing maintenance will protect that investment and keep your exterior looking fresh.
Inspect your home’s exterior every spring and fall. Look for areas where caulking has cracked or pulled away around windows and doors. Re-caulk these gaps immediately to prevent water from seeping behind the siding. Keep tree branches and shrubs trimmed back from the house so they do not scrape against the fresh paint.
Wash your home’s exterior gently once a year. A low-pressure rinse removes accumulated dirt and pollution that can degrade the paint over time. If you notice any small areas of peeling or chipping, touch them up promptly before the damage spreads.
Ready to Transform Your Home?
Painting your residential exterior is a highly rewarding project that completely transforms your property. By understanding the importance of meticulous prep work, choosing the right materials, and applying the paint correctly, you ensure a stunning result.
Take a walk around your house this weekend. Note the areas that need repairs and start exploring color options. With proper planning and execution, your home will soon boast the best curb appeal in the neighborhood.