Before embarking on the job of painting the exterior of your house, it is vital to complete a strict pre-painting checklist. Begin by doing a full examination of the entire exterior, finding any cracks, peeling paint, water damage, or indications of mold and mildew. Thoroughly clean the surfaces with a power washer or scrub brushes with mild detergent, creating a dirt-free and smooth canvas for Painting an Exterior House. Address any concerns by mending cracks, holes, and restoring any damaged sections. Scrape off loose paint and sand the surface to achieve optimum paint adhesion. Take care to secure surrounding locations from unintended paint splatters. Check for indications of rot or decay on wood surfaces and repair any damaged wood.
Applying a good primer is crucial for enhanced adhesion and paint longevity. Choose the suitable type of exterior paint, considering weather-resistant and UV-resistant possibilities. Test the paint on a little area before applying it to the full surface. Monitor weather conditions and ensure you have a few consecutive days of dry and beautiful weather for Painting an Exterior House. Use suitable painting equipment, coordinate your painting technique, and apply several thin coats for a superb finish. Allow proper drying and curing time as per the paint manufacturer’s specifications. Finally, clean up your painting equipment completely after the operation is done. By strictly following this pre-painting checklist, you may insure a successful and long-lasting exterior house painting job.
Inspection and Assessment
During the inspection and assessment phase of pre-Painting an Exterior House, it is necessary to thoroughly analyze the complete exterior surface of the property. This critical step comprises detecting any existing faults that could impact the paint job’s success and endurance. One must seek for symptoms of wear and tear, such as cracks, peeling paint, water damage, and the growth of mold or mildew. By painstakingly marking spots in need of repair or attention, homeowners and painters may effectively prepare for the essential preparations. This complete assessment sets the foundation for a successful external painting project, as it enables the rapid treatment of underlying concerns and ensures a clean and sound surface for the paint to adhere to.

Note down locations that need repair or attention
After concluding the inspection and assessment, writing down spots that require repair or attention becomes a vital step in the pre-Painting an Exterior House method. By correctly noting these problems, homeowners and painters can prioritize and address them effectively. Common sites that may need repair include cracks in the walls, especially around windows and doors, where water entry could occur. Peeling or flaking paint should be identified to prevent it from affecting the new paint’s adhesion.
Water damage and leaks must be rectified to avoid future structural concerns and mold formation. Additionally, any signs of mold or mildew should be handled and eliminated to ensure a healthy living environment. By taking note of these spots and repairing them before painting, one may secure a smooth and long-lasting paint work, sparing the property from future harm and retaining its attractiveness for years to come.
Surface Preparation Clean the surface entirely
Surface preparation is a crucial component of the pre-painting process, and one of the primary operations is to clean the surface correctly. Before applying paint, it is necessary to ensure that the outer surface is free from dirt, dust, grease, grime, and other contaminants that could impair paint adhesion. To achieve this, a full cleaning technique is essential. Homeowners and painters may use a power washer or scrub brushes with a little detergent to remove stubborn stains and deposits. After cleaning, it is vital to rinse the surface properly and allow it to dry entirely before continuing with the Painting an Exterior House.
Cleaning the surface not only creates a clean canvas for the paint to adhere to but also helps to generate a smoother and more professional finish. Neglecting this step could lead to paint peeling, flaking, or early deterioration, making the effort and investment in painting less effective in the long run. By taking the time to clean the surface fully, homeowners may develop a sturdy foundation for a successful and long-lasting Painting an Exterior House venture.
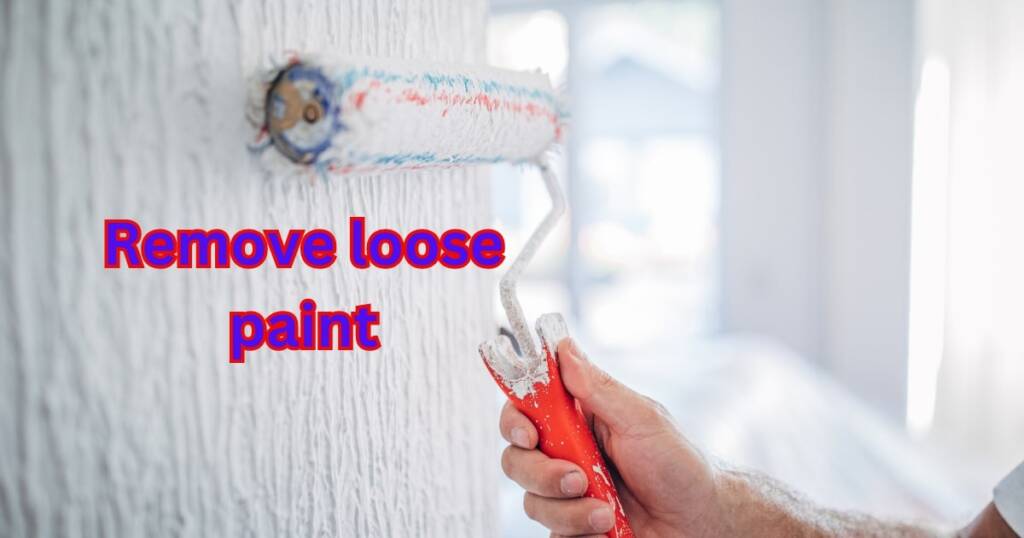
Remove loose paint
Removing loose paint is a critical stage in the surface preparation technique before Painting an Exterior House the exterior of a property. Loose or peeling paint could drastically impact the new paint’s adhesion and result in an uneven and unsightly look. To solve this issue, homeowners and painters should use a paint scraper or a wire brush to carefully remove any loose or peeling paint off the surface. It is vital to be thorough in this step,
ensuring that any loose paint is scraped off to generate a smooth and durable surface for the new paint to stick to. Once the loose paint has been removed, the surface should be checked again to ensure that no areas are left untreated. By taking the time to remove loose paint, homeowners can assure that the new paint will apply properly and produce a durable and appealing finish to the exterior of their property.
Smooth down rough patches and edges to promote adhesion
Smoothing away rough spots and edges is another vital aspect of surface preparation to promote paint adhesion when Painting an Exterior House the exterior of a property. After removing loose paint and fixing any faults, there might still be rough patches or uneven surfaces that can impede the new paint from attaching properly. To correct this, homeowners and painters should lightly sand the surface.
Using sandpaper or a sanding block, gently smooth away rough patches and edges on the outside surface. This method not only helps the paint adhere more effectively but also provides a consistent and aesthetically stunning finish. By sanding the surface, any faults, lumps, or uneven textures are eliminated, providing a smoother canvas for the paint to adhere with.
It’s vital to pay attention to details and ensure that the entire surface is sanded consistently. Additionally, after sanding, it’s a good practice to wipe the surface again to remove any dust or debris generated during the sanding process.
By taking the time to smooth away rough patches and edges through thorough sanding, homeowners may greatly enhance the paint’s adhesion and create a more professional and lasting exterior paint job for their house.
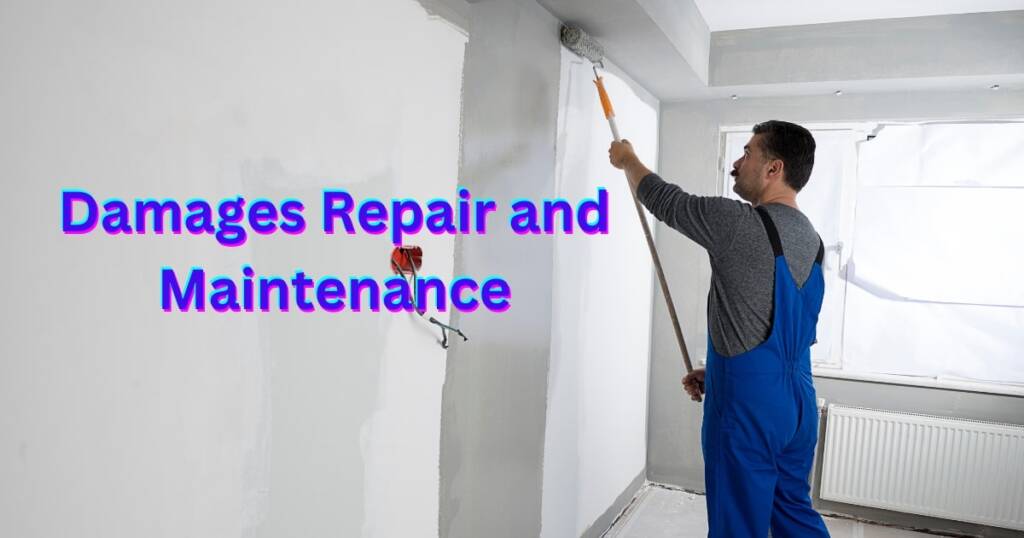
Damages Repair and Maintenance
The “Damages Repair and Maintenance” step is a vital element in the pre-painting checklist for Painting an Exterior House the exterior of a house. During this process, a comprehensive inspection of the outside surface is done, and any existing flaws or defects are detected. Common problems that require repair include cracks, holes, peeling paint, water damage, and indicators of rot or decay.
To tackle these challenges, homeowners and painters conduct the needed repair and maintenance work. Cracks and holes are mended using appropriate materials such as caulk or spackling compound to provide a smooth and level surface. Peeling paint is carefully scraped off to prevent it from compromising the new paint’s adhesion.
Water damage, if existing, is addressed to minimize further deterioration and possibly structural concerns. Any signs of rot or decay in wood surfaces should be swiftly dealt with by replacing the damaged wood and applying wood preservative to guard against future difficulties. By meticulously repairing and maintaining the outer surface, the overall condition of the house is enhanced, and the paint job’s endurance is strengthened. This proactive procedure insures that the fresh paint will apply effectively and result in a beautiful and long-lasting finish that adds value and curb appeal to the home.
Surface Protection Replace damaged wood
During the surface protection step of pre-Painting an Exterior House, it is necessary to treat any damaged wood on the exterior of the property. Damaged or rotting wood may impair the structural integrity of the building and substantially affect the paint job’s longevity. To create a solid and stable surface for painting, homeowners and painters should carefully evaluate any wood elements, such as siding, trim, fascia, and soffits.
When damaged wood is found, it should be immediately replaced with new, sound pieces of wood. The replacement process entails cutting off the damaged sections and securely putting the new wood in their place. It is crucial to employ exterior-grade wood that is resistant to dampness and decay, assuring superior durability in outside settings.
By repairing and replacing damaged wood, the house is more guarded against probable risks including water infiltration, rot, and insect infestations. Additionally, the fresh paint will cling more effectively to a hard and well-maintained surface, resulting in a smoother and more aesthetically pleasing finish.
For homeowners who are confused or uncomfortable with wood replacement, employing the services of a professional carpenter or contractor may assure that the job is done accurately and to industry standards. Ultimately, taking the time to repair damaged wood protects the structural integrity of the property and builds the basis for a successful and long-lasting exterior painting project.
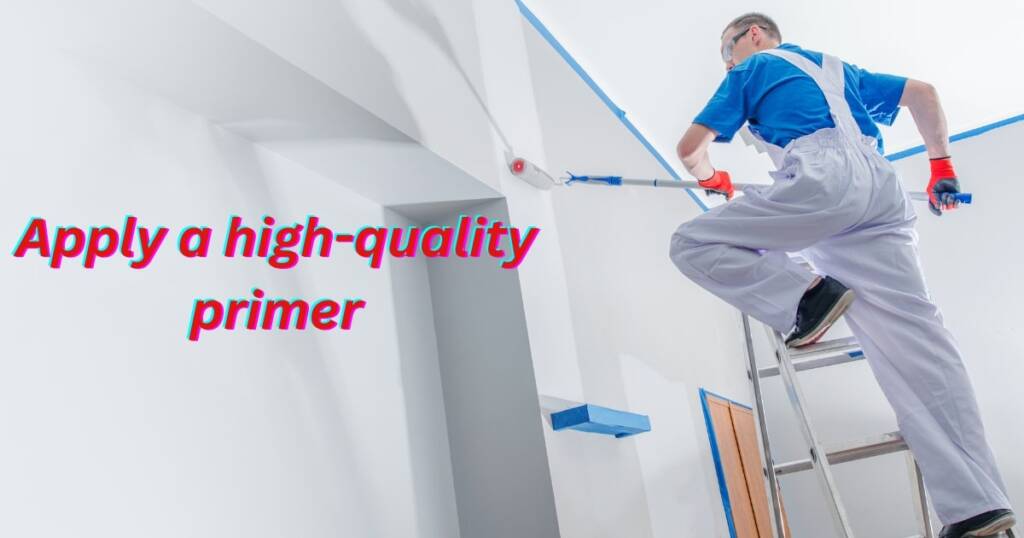
Apply a high-quality primer
Applying a high-quality primer is a key stage in the pre-Painting an Exterior House procedure when addressing the exterior of a house. Primer functions as a preparatory layer that optimizes paint adhesion, promotes better coverage, and increases the overall lifetime of the paint job.
Before the actual paint is applied, the primer works as a bonding agent between the surface and the paint, producing a hard and solid framework for the topcoat. It helps to seal porous surfaces, filling up microscopic imperfections and generating a smoother canvas for the paint to adhere to. This is especially critical for bare wood, stucco, or brick surfaces, as they tend to absorb paint differently than other materials.
Using a high-quality primer ensures that the paint will adhere better, minimizing the chances of peeling, cracking, or flaking over time. It also helps to avoid stains, water damage, and other potential difficulties that might undermine the paint’s effectiveness.
When selecting a primer, it is vital to choose one that is particularly made for outdoor use and suited with the sort of paint that will be applied. Different primers are available for different surfaces, hence it’s necessary to follow the manufacturer’s requirements. By taking the time to apply a high-quality primer, homeowners may substantially increase the overall finish and longevity of their exterior paint job. It establishes the groundwork for a successful and aesthetically stunning transformation, preserving the property and improving its curb appeal for years to come.