Are you noticing an ugly paint bubble on the walls of your house? Try not to stress we have concocted the arrangement! In this blog post, we’ll discuss how to quickly and easily fix paint bubbles to keep your walls looking as good as new.
Causes for paint bubbles
Paint bubbles can appear for a number of reasons, including:
1 Moisture: If moisture gets trapped under the fix paint bubbles, it can cause the paint to bubble and peel. This can happen if the surface is not properly prepared before painting or if there is a leak in the building that allows water to enter.
2 Heat: Extreme heat can cause paint to expand and contract, causing bubbles to form on the surface. It is seen when exposed to direct sunlight.
3 Dirty or greasy surfaces: If the surface is not properly cleaned before painting, any dirt or grease on the surface can cause the paint to bubble and peel.
4 Poor Adhesion: If the surface is not properly prepared or the wrong type of paint is used, the paint may not adhere properly to the surface, resulting in bubbles.
5 Improper Application: If the paint is applied too thickly or is not allowed to dry properly between coats, it can cause bubbles to form on the surface.
6 Chemical reaction: In some cases, a chemical reaction between the paint and the surface can create bubbles. This is more likely to happen when painting over old or incompatible fix paint bubbles.
Here are some ideas on what causes bubbles.
The correct method for applying paint
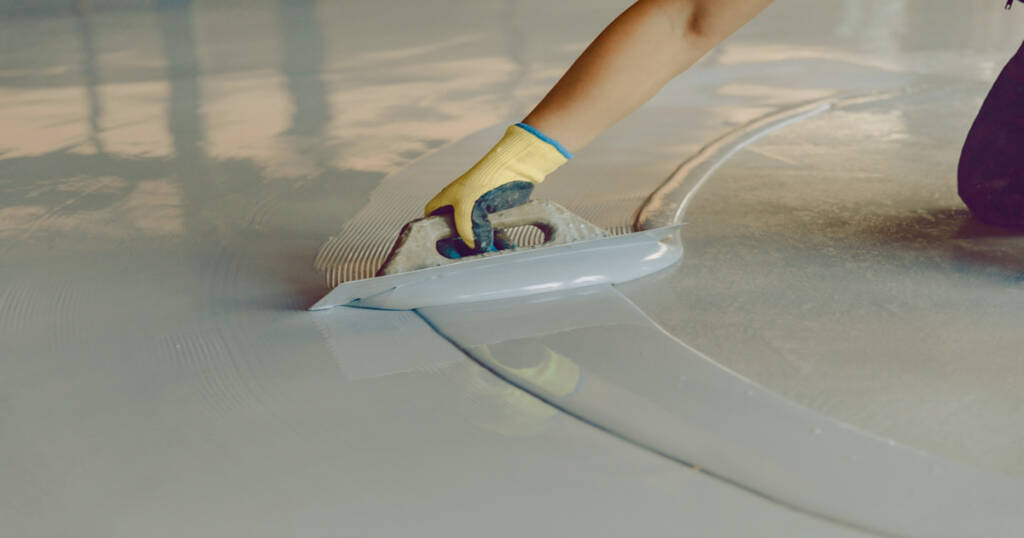
Before you paint any surface, it is vital to prepare your wall correctly. Be careful to get your property painted by a professional; you need to use good-quality paint to help the paint endure longer. Before painting, start by scrubbing the painted surface with soap and water, then wash and dry the wall. Here are some steps to apply the fix paint bubbles correctly:
1. Start by applying a primer to the surface. This will help the paint stick better and give an even base tone.
2. Once the primer is dry, mix the paint with an anti-foaming agent. This will help reduce the chance of bubbles or blisters as the paint dries.
3. To further reduce the risk of bubbles, increase the temperature and humidity in the room where you are painting. Higher temperatures and more humidity will help keep the paint on the surface and make it dry faster.
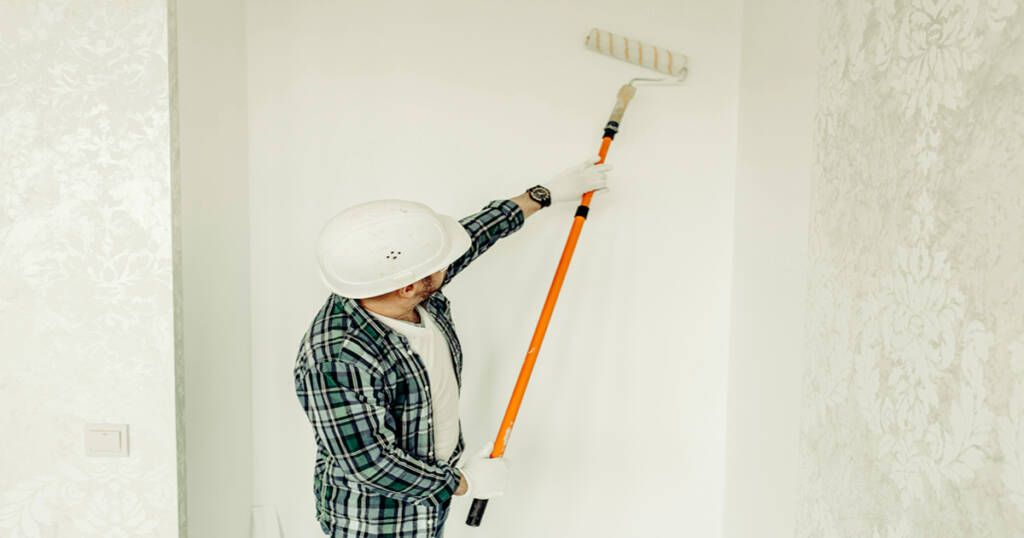
4. Use a high-quality brush or roller to apply the paint in even strokes. Begin toward one side of the surface and work your way across. Make sure to overlap each stroke slightly to ensure an even finish.
5. Allow the first coat to dry completely before applying a second coat if necessary.
By following these methods, you may quickly and effectively cure any bubbling or blistering paint issues you have. After applying all layers, be careful to let the paint completely dry before exposing it to dampness. Latex paint normally takes two to three days to completely cure. If possible, do not put furniture near freshly painted surfaces until they are totally dried. Finally, it’s also crucial to remember that lighter colors may take many coats to get complete coverage. Keep this in mind when determining what sort of fix paint bubbles to use and how much to purchase. With correct preparation and application procedures, you may obtain gorgeous results every time!
Set up the surface for painting
Setting up the surface before you start painting is key. The following are a number of pointers to assist you get things moving:
1. Clean the surface: Before you start painting, make sure the surface is thoroughly clean. Use a mild detergent and warm water to wash away any dirt, dust, or grime. Permit the surface to dry totally prior to beginning.
2. Scrape off old paint: If there is any existing fix paint bubbles on the surface, scrape it off with a scraper or putty knife. Make certain to wear gloves and well-being glasses while doing this.
3. Sand the surface: To create a smooth finish, sand the surface using medium-grit sandpaper. This will help remove any blockages and give you a better finish.
4. Fill any cracks: Any gaps or cracks in the surface should be filled with good-quality filler. Permit it to dry totally prior to proceeding.
5. Dust removal: Once you have finished preparing the surface, use a damp cloth to wipe away any dust.
By following these easy procedures, your home won’t bubble, it will look wonderful, and you can make sure your painting endeavor goes well! Now that the surface is primed, you may start painting. It’s recommended to use high-quality latex paint for work like this. Start by applying primer, and then continue with two coats of paint. Each layer of paint must be totally dry before adding another. After applying all the layers, you may also consider adding a sealer. This will help preserve the painted surface and prevent further bubbles. With these easy actions, your bubbled paint will look like new again!
Apply a primer
Applying a primer might be a vital step when attempting to cure fix paint bubbles. Primers are meant to assist establish a firm, resilient surface upon which the paint can properly adhere and attach. Before you apply your primer, make sure to clean the surface completely. Use a moist cloth and soapy water to remove dirt, dust, or other impurities that may prevent the primer from sticking to the surface. After the surface is entirely dry, use a brush or roller to apply the primer in thin, uniform applications.
Allow each application of primer to dry before applying the next coat. Once all the applications are dry, you may continue on to painting the surface. Again, make cautious to clean the surface before applying any paint. Then, using a brush or roller, begin applying paint in thin, equal layers. Each layer should be allowed to dry fully before going on to the next. If you are utilizing a two-tone color scheme for your project, leave some time between colors to establish them appropriately.
Depending on the sort of finish you desire, it may be essential to sand down the surface after each application. This will guarantee seamless coverage. Additionally, to further prevent against any potential peeling or bubbling, it is advisable to apply a sealer after all layers are complete. Be careful to wait at least 24 hours after applying the last layer of paint before adding a sealer. Finally, with correct application and maintenance, your freshly painted surfaces will look beautiful for years to come!
Say goodbye to ugly fix paint bubbles on your walls with our experienced home painting service! Our team of skilled specialists provides a rapid, dependable method to correct paint bubbles, leaving your walls looking fresh and faultless. Don’t allow bubbling paint damage the appearance of your house – call us immediately to arrange your appointment!
Add foaming expert enemies to paint
The enemy of foaming specialists (also known as an anti-foaming agent) is a chemical that stops foaming or bubbles from developing in liquids. When applied to paint, they assist limit the quantity of air fix paint bubbles that may develop and cause blistering.
It’s vital to understand that adding a foaming specialist to your paint won’t minimize all bubbles, but it will help lessen them. It is crucial to apply the optimum quantity of anti-foaming agent to the paint; too much might impact the drying time of the paint, and too little will not do enough to prevent bubbling.
To add Enemy of Foaming Expert to your paint, start by following the guidelines on the package label. Depending on the sort of foaming agent you use, you may need to mix it with water before adding it to your paint. Once you have done this, gently add the mixture to your paint and stir it carefully. Keep stirring until you’re confident it’s properly combined, then apply it to your walls as normal.
To guarantee the best possible results, make sure you carefully prepare your wall surfaces before applying the paint. Make sure any loose particles are removed, and fix any holes or fractures with putty. Additionally, apply primer to any fresh surface before commencing the painting process. Primers establish a barrier between the wall and the paint that helps cover any flaws in the wall surface and protects the paint from peeling and scorching.
Finally, make sure you’re using excellent fix paint bubbles and brushes for the project at hand. Cheap paints may seem like a good idea at first, but their low quality may sometimes lead to more bubbles owing to a lack of quality ingredients. Quality brushes enable consistent coverage, which helps limit the likelihood of bubbling during the application process.

Increase temperature and magnesium
Increasing the temperature and humidity in the area where you are painting may help avoid paint bubbles. Heat removes moisture from the air more rapidly, which may help the paint dry evenly and eliminate bubbles. If you reside in an area with extreme temperatures, it may be a good idea to paint during the cooler part of the day when the temperature is lower. If you reside in a chilly environment, you may use a dehumidifier to lower the humidity in the air.
Regardless, make sure to keep an eye on the temperature and humidity of the area you’re painting. Excessive heat or humidity might cause the fix paint bubbles to dry too rapidly and cause bubbles to appear on the surface. The best approach to check these parameters is via a hygrometer, which is a device that detects both temperature and humidity levels. It should be put near to painted walls, ideally around six feet away from them. Additionally, the space should be well-ventilated when painting. This will promote appropriate air circulation and help avoid condensation on your walls.